
The following article is intended for Nexus administrators. Your view may not reflect the following content if you have not been assigned an Admin role.
Description
Managing permissions across multiple users can be made easy by using groups. Permissions can be assigned at the group level to prevent having to do it per user.
Steps
Creating groups
-
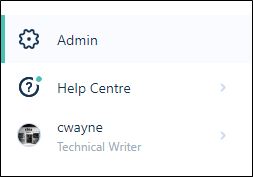
On the Navigation menu, click Admin to open the Administration window
-
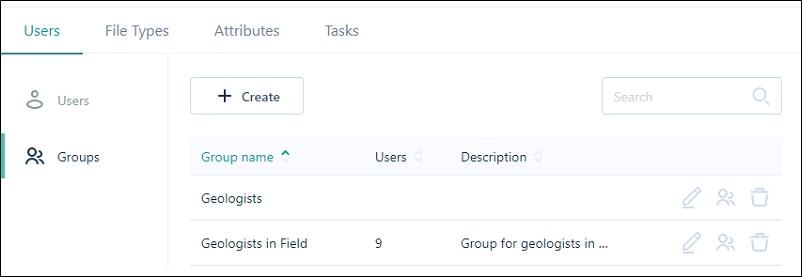
Click to select the Users tab.
-
Click Groups to switch to the Groups pane. Any groups that were previously created are listed
-
Click the Create button to create a new group
-
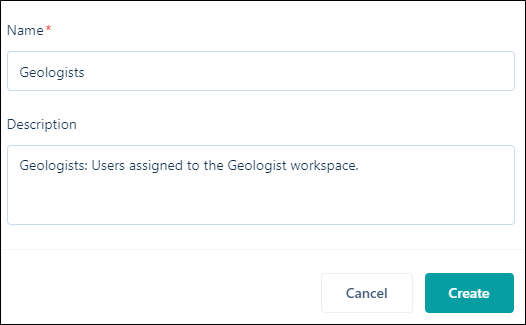
Enter a Name and a Description for the group
-
Click Create.
Adding and removing users from groups
The following steps show how you can add and remove users at the group level. This can also be done at the user level.
- On the Navigation menu, click Admin
- Click Users followed by Groups
- Click on the ellipsis at the far right of the group row, select Manage users
- Click the + symbol on a corresponding user that you would like to add to the group. You can click the trash symbol to remove a user from the group
- Click Save to apply your changes
Editing groups
- On the Navigation menu, click Admin
- Click Users followed by Groups
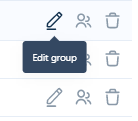
- Click on the ellipsis at the far right of the group row, select Edit group
- In the Edit Group dialog, enter a Name and a Description for the group
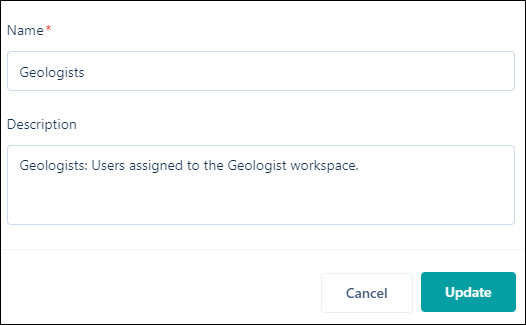
- Click Update to save your changes.
Deleting groups
- On the Navigation menu, click Admin
- Click Users followed by Groups
- Click on the ellipsis at the far right of the group row, select Edit group
- Click Delete
Comments
0 comments
Please sign in to leave a comment.